How to change your skin on Minecraft Java
This brief guide details how to change your character's appearance in Minecraft Java. It offers clear, step-by-step instructions, guiding players through the interface to upload custom skin files and personalize their avatar.
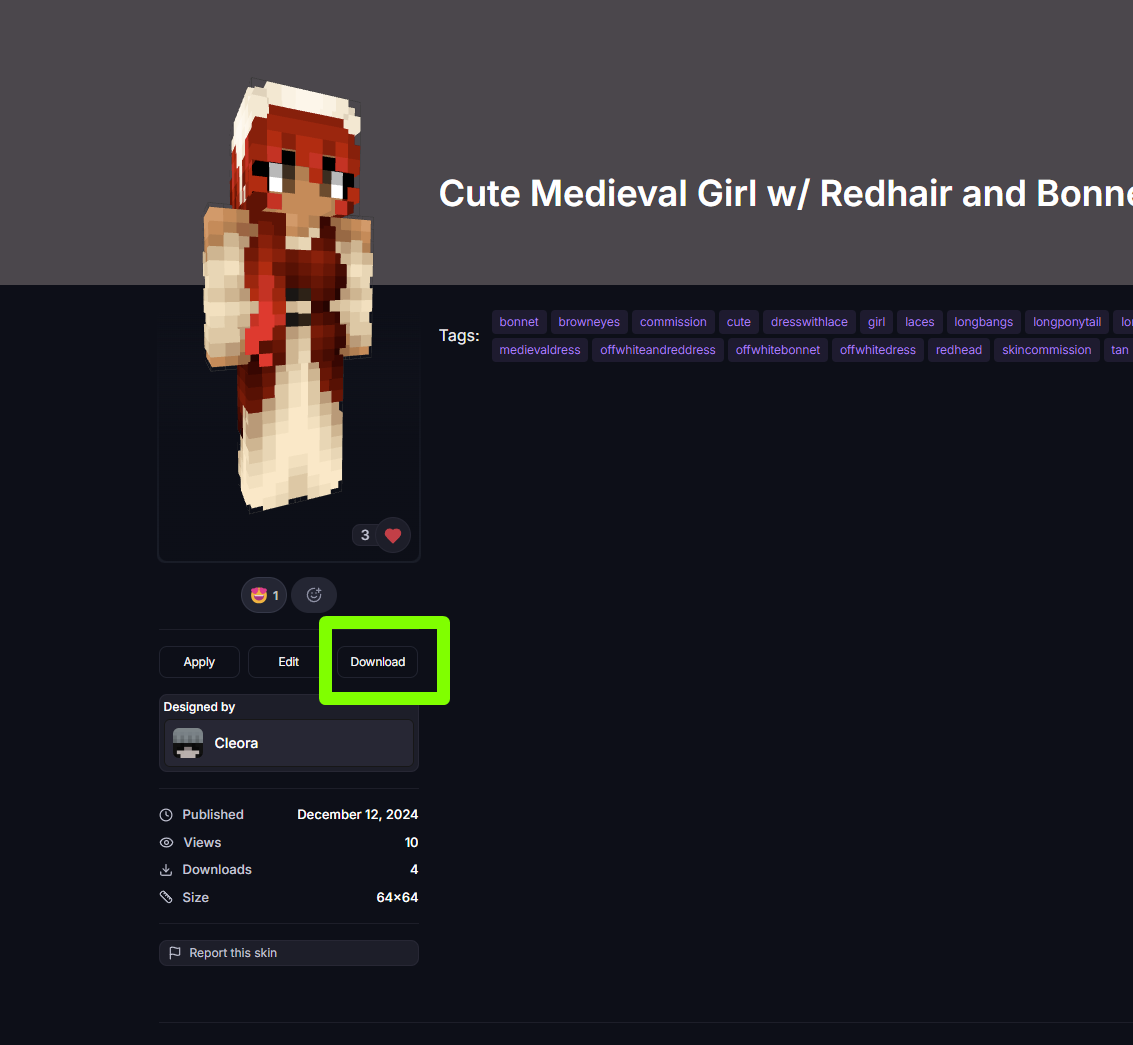
Look through skins in our Browse section to find your favorite, or use our Minecraft skin editor to design your own skin. Once you've found or finished designing your Minecraft skin, simply click Download Skin.
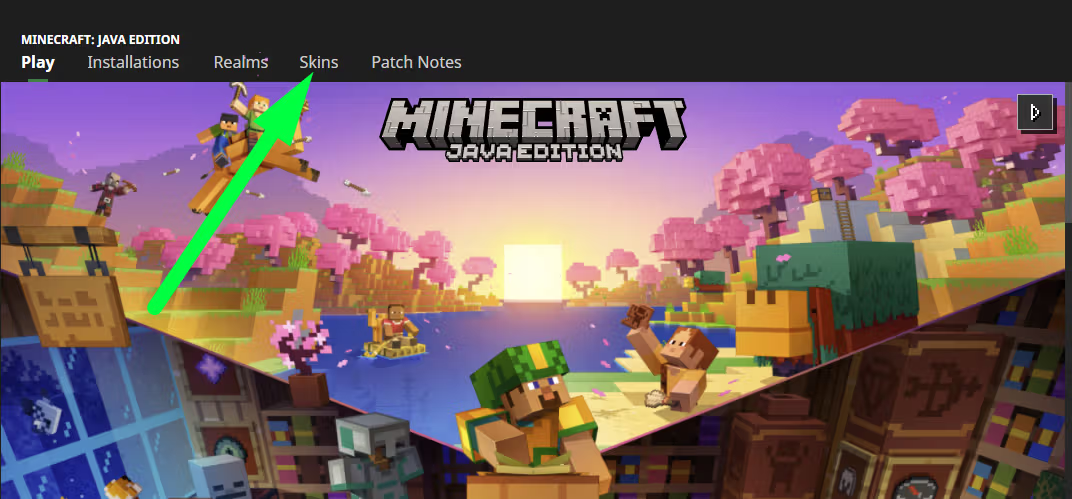
After downloading your skin, open the Minecraft Launcher and navigate to the "Skins" tab.
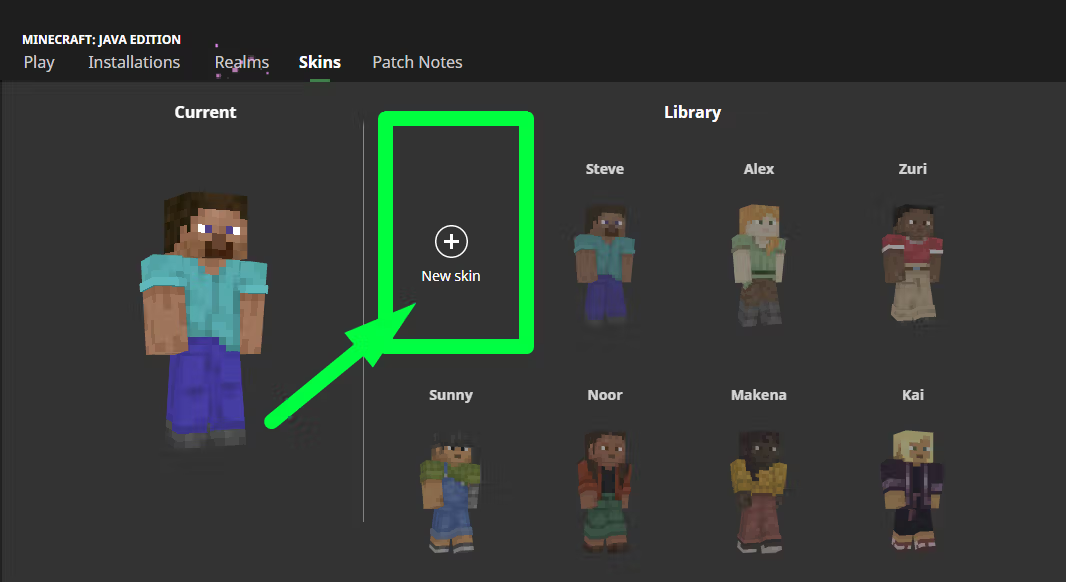
Click "New Skin" and select the downloaded image from your computer, typically found in the Downloads folder.
After choosing your skin, add an appropriate name, select a player model based on your preferences, and optionally choose a cape. Once satisfied, simply click the "Save & Use" button to apply your newly uploaded skin.
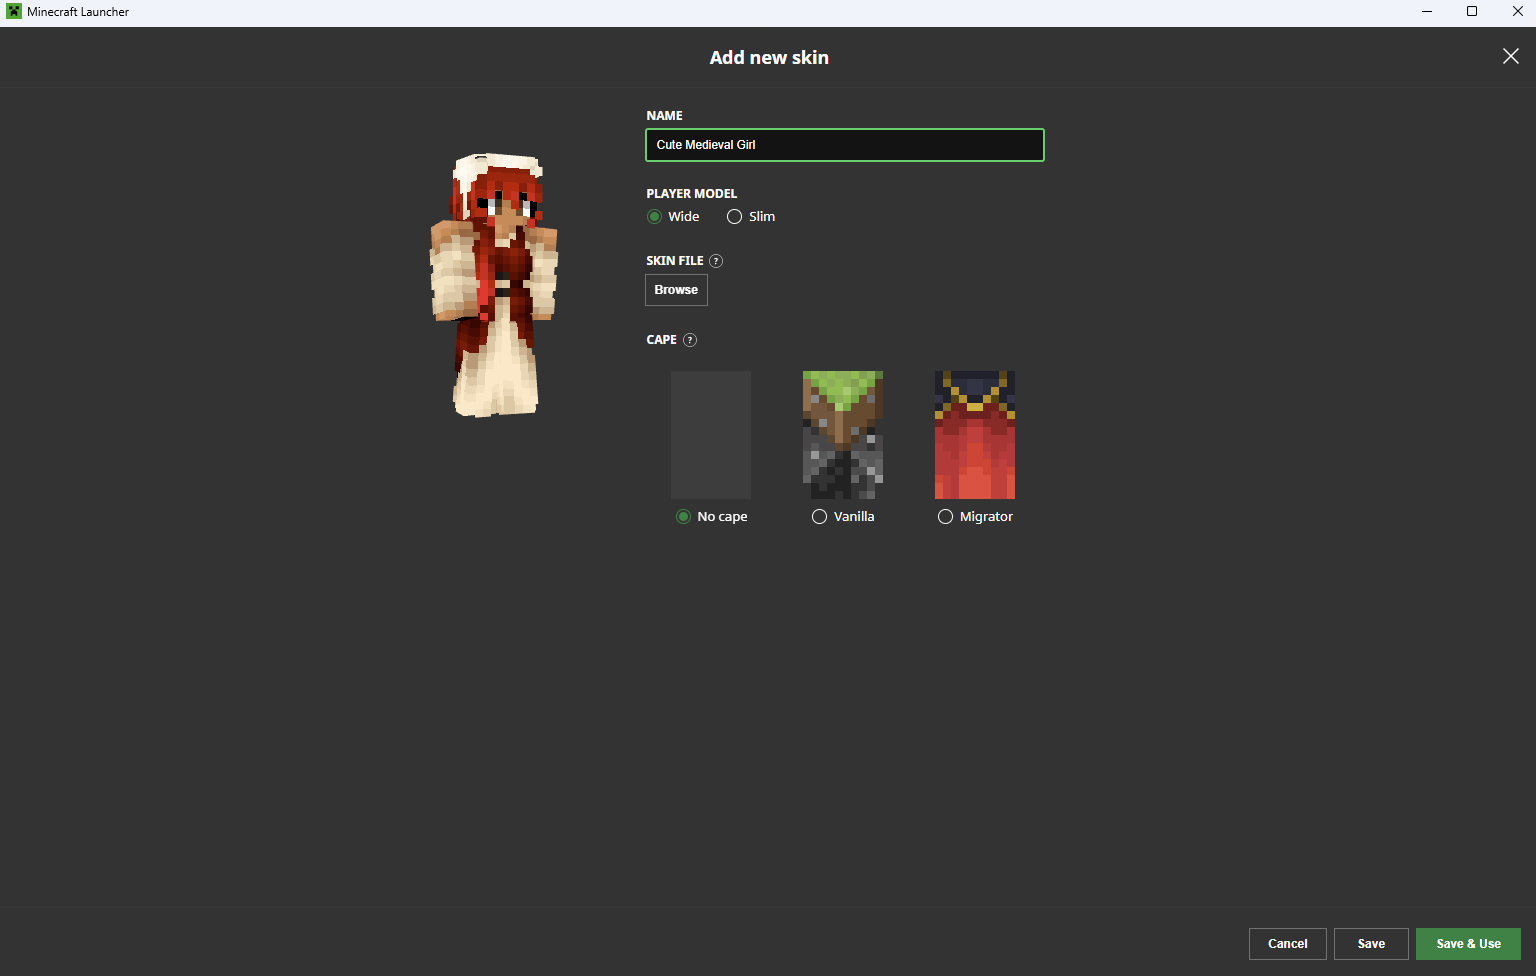
That's pretty much it! Hit "Play" and let your friends see your cool new Minecraft skin you just added. Enjoy showing off your unique character!
While uploading and customizing Minecraft skins is generally a straightforward process, you may encounter some issues along the way. Here are a few common problems and their solutions:
If you've changed your skin but it's not updating in the game, try logging out of Minecraft completely and then logging back in. This will refresh your character's appearance and apply the new skin.
If you're stuck with the default skin during multiplayer, try logging out and back in for a refresh. If everyone's skins look the same, the server might be running in offline mode.
Remember, Minecraft skin customization is a fantastic way to personalize your gaming experience and stand out in the virtual world. So, go ahead, explore, and make your mark in the game!
If you make Minecraft skins, join us and display your artwork to others. Share your creations and connect with fellow skin creators!